Metal Tray
In week 4 we learned how to make the metal tray.
Two people are in a small group, each person did the tray individually, then combine both trays together to see if they fits perfectly.
Step 1:
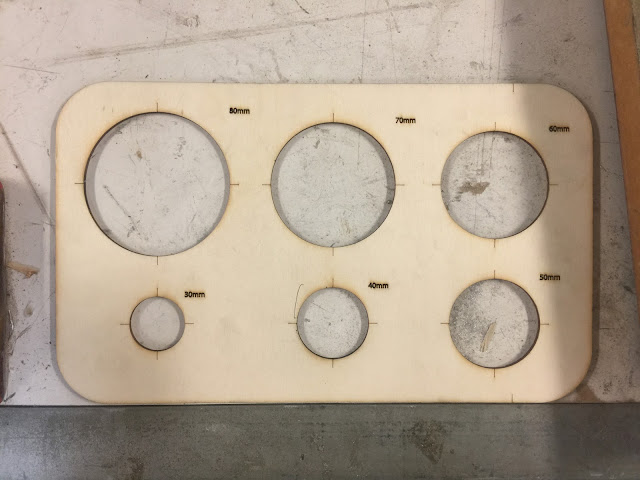
Dtermining which arc we should draw on the plank from the pre-prepared arc template.
Usually when the arc is smaller, the tray is more difficult to make. I choosed the smallest arc, which is 30mm, to challenge myself if I can make it.
Using the arc template to draw the arc on the four corners of the plank.
Step 2:
Using the sanding machine to grind off the perpendicular corners following the guiding arc lines we just drawn. The plank will be used as the template for striking the tray later.
Step 3:
Placing the plank on the top of the aluminum sheet to draw the shape. The space around the tray will be bended inward when striking later, so we need to leave the bended space on the aluminum sheet. The length of the outer bended part should be equal to the thickness of the plank. So I just need to rotate the plank to 4 different directions respectively to draw the outer bended shape on the aluminum sheet. Then we can use metal scissors to cut off the final shape.
Step 4:
Placing two plank templates on both sides of the aluminum sheet, and making sure that the templates align the middle shape of the aluminum sheet and two templates align to each other. Then using the clamp machine to clamp them.
Step 5:
Using the hammer to strike the aluminum piece gently and making the outer parts are slightly bended inward.
Step 6:
Using the hammer to strike the corner carefully, the edge will gradually bended inward and the overall tray shape will appear. Following the steps for other corners.
Step 7:
Using sand paper to polish the final tray, making teh surface more smooth.
Final tray:
Two trays fit perfect:
Two people are in a small group, each person did the tray individually, then combine both trays together to see if they fits perfectly.
Step 1:
Dtermining which arc we should draw on the plank from the pre-prepared arc template.
Using the arc template to draw the arc on the four corners of the plank.
Using the sanding machine to grind off the perpendicular corners following the guiding arc lines we just drawn. The plank will be used as the template for striking the tray later.
Step 3:
Placing the plank on the top of the aluminum sheet to draw the shape. The space around the tray will be bended inward when striking later, so we need to leave the bended space on the aluminum sheet. The length of the outer bended part should be equal to the thickness of the plank. So I just need to rotate the plank to 4 different directions respectively to draw the outer bended shape on the aluminum sheet. Then we can use metal scissors to cut off the final shape.
Step 4:
Placing two plank templates on both sides of the aluminum sheet, and making sure that the templates align the middle shape of the aluminum sheet and two templates align to each other. Then using the clamp machine to clamp them.
Step 5:
Using the hammer to strike the aluminum piece gently and making the outer parts are slightly bended inward.
Step 6:
Using the hammer to strike the corner carefully, the edge will gradually bended inward and the overall tray shape will appear. Following the steps for other corners.
Step 7:
Using sand paper to polish the final tray, making teh surface more smooth.
Final tray:
Two trays fit perfect:


Comments
Post a Comment